- Log in to WordPress Admin:
Open your web browser and navigate to your WordPress admin dashboard. Typically, you can access it by adding “/wp-admin” to your domain name (e.g., `http://yourdomain.com/wp-admin`).
- Navigate to the Plugins Section:
Once you’re logged in, you’ll be in the WordPress admin dashboard. Look for the “Plugins” option in the left-hand menu. Hover over it, and a submenu will appear.
- Click on “Add New”:
In the submenu under “Plugins,” click on the “Add New” option. This will take you to the “Add Plugins” page.
- Upload the Plugin:
On the “Add Plugins” page, you’ll see a few tabs at the top. Click on the “Upload Plugin” tab.
- Choose the Plugin ZIP File:
You should see a button labeled “Choose File” or “Browse.” Click this button to open a file browser dialog. Navigate to the location on your computer where you have the “wcfp-custom-fields-products” plugin ZIP file. Select the ZIP file and click “Open.”
- Install the Plugin:
After selecting the plugin ZIP file, click the “Install Now” button. WordPress will start uploading and installing the plugin.
- Activate the Plugin:
Once the plugin is installed, you’ll see a success message. You can now click the “Activate Plugin” button to activate the plugin on your website.
That’s it! You’ve successfully uploaded and activated the “WooCommerce Custom Fields for Products” plugin on your WordPress website using the admin dashboard. Remember to keep your plugins updated and ensure they are compatible with your WordPress version to maintain a secure and functional website.
2. How to configure Plugin
Log in to WordPress Admin:
Start by logging in to your WordPress admin dashboard.
Navigate to Products:
In the left-hand menu, locate and click on “Products -> Edit product.” This will take you to the product edit page.
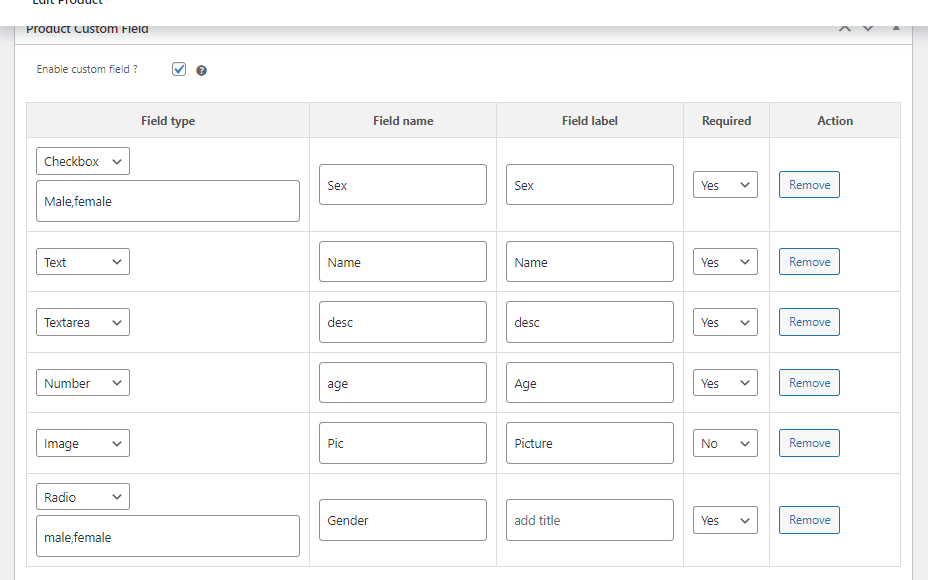
Enable/Disable Custom field:
Here you can find meta box with enable/disable custom field. Checked the box to enable custom field for particular product.
Add custom fields:
Within the product page you can add custom field by clicking on + Add button
here you can find Field type(text, text area, number etc.), Field name(e.g. your-name), Field label(e.g. You name) and required field to set yes or no
Save Changes:
After configuring click on the update the settings.
By following these steps, you can successfully set up and configure custom fields for current product for you store.
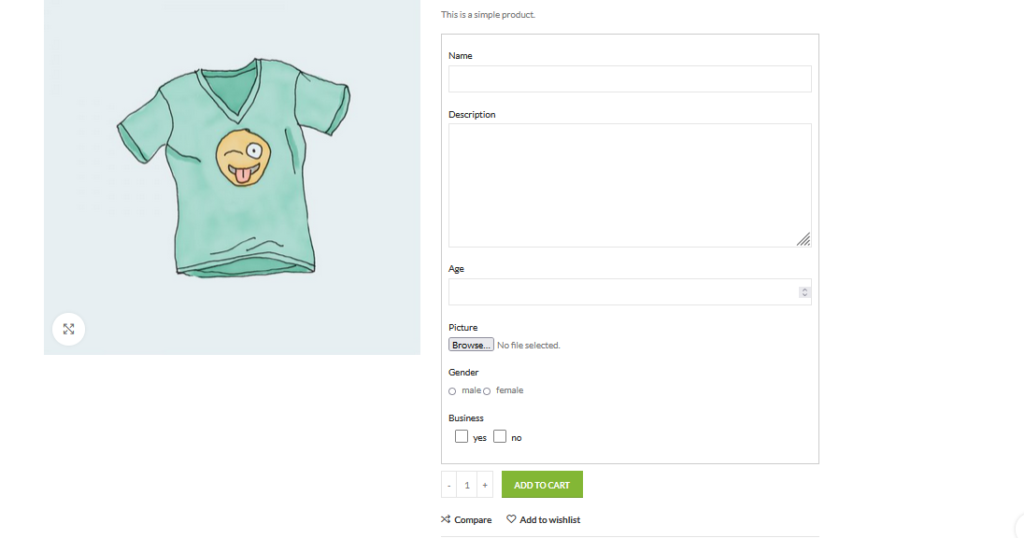
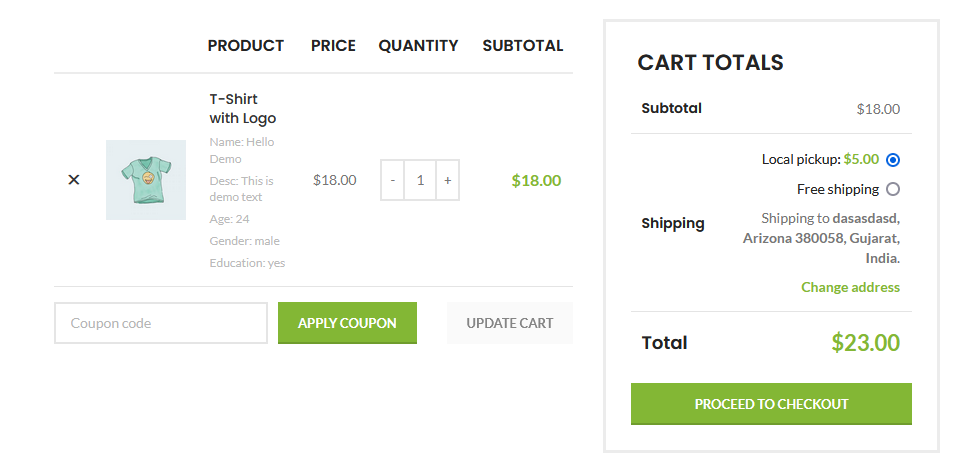
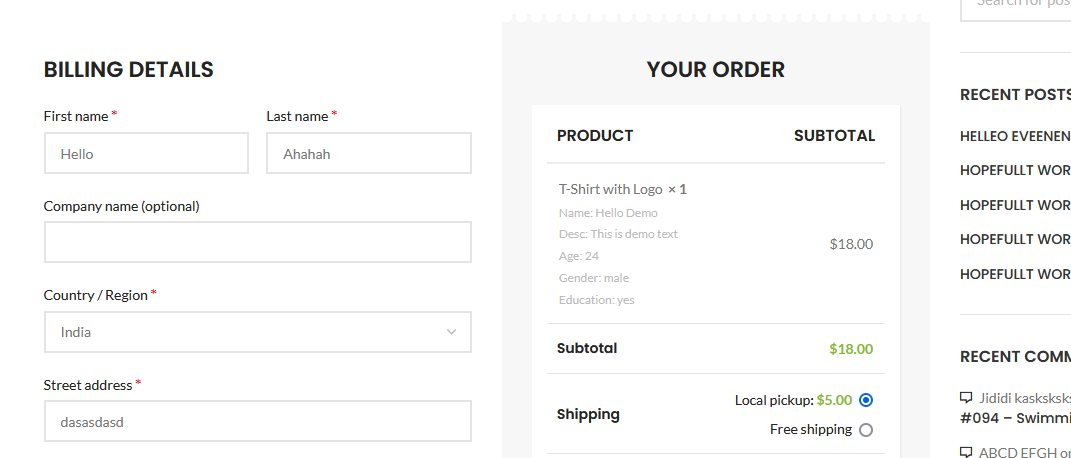
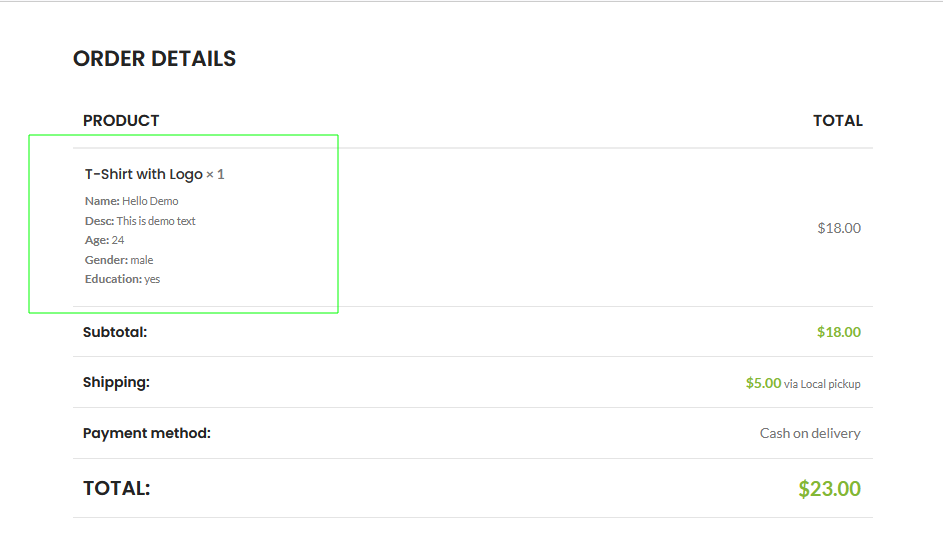
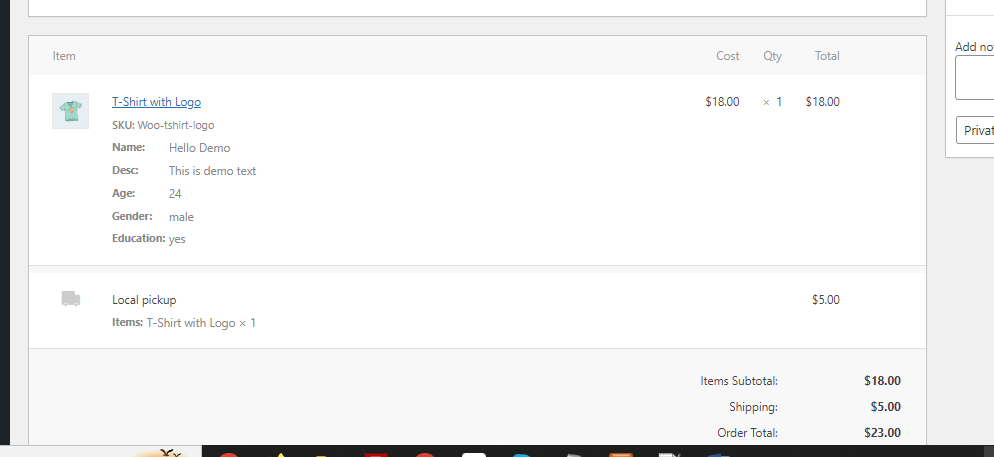
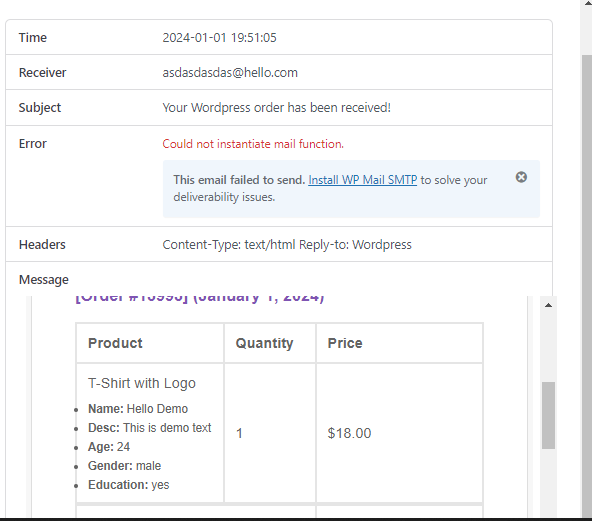
Added field will be showing in product page, cart, checkout, order thank you page, order details and email.
Please check screenshot for more idea.