- Log in to WordPress Admin:
Open your web browser and navigate to your WordPress admin dashboard. Typically, you can access it by adding “/wp-admin” to your domain name (e.g., `http://yourdomain.com/wp-admin`).
- Navigate to the Plugins Section:
Once you’re logged in, you’ll be in the WordPress admin dashboard. Look for the “Plugins” option in the left-hand menu. Hover over it, and a submenu will appear.
- Click on “Add New”:
In the submenu under “Plugins,” click on the “Add New” option. This will take you to the “Add Plugins” page.
- Upload the Plugin:
On the “Add Plugins” page, you’ll see a few tabs at the top. Click on the “Upload Plugin” tab.
- Choose the Plugin ZIP File:
You should see a button labeled “Choose File” or “Browse.” Click this button to open a file browser dialog. Navigate to the location on your computer where you have the “wpp-purchase-protection” plugin ZIP file. Select the ZIP file and click “Open.”
- Install the Plugin:
After selecting the plugin ZIP file, click the “Install Now” button. WordPress will start uploading and installing the plugin.
- Activate the Plugin:
Once the plugin is installed, you’ll see a success message. You can now click the “Activate Plugin” button to activate the plugin on your website.
That’s it! You’ve successfully uploaded and activated the “WooCommerce purchase protection” plugin on your WordPress website using the admin dashboard. Remember to keep your plugins updated and ensure they are compatible with your WordPress version to maintain a secure and functional website.
2. How to configure Plugin
Log in to WordPress Admin:
Start by logging in to your WordPress admin dashboard.
Navigate to WooCommerce:
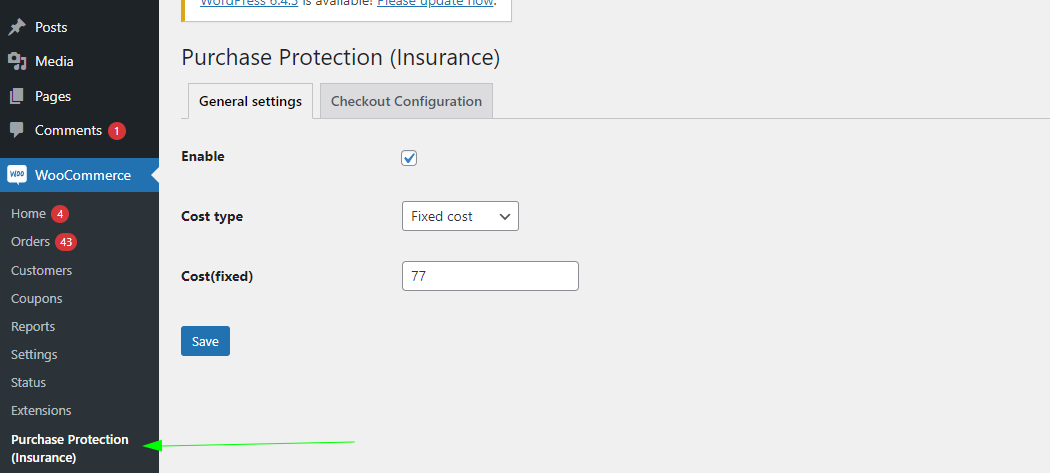
In the left-hand menu, locate and click on “WooCommerce -> Purchase protection.” This will take you to the settings page.
Access Purchase protection:
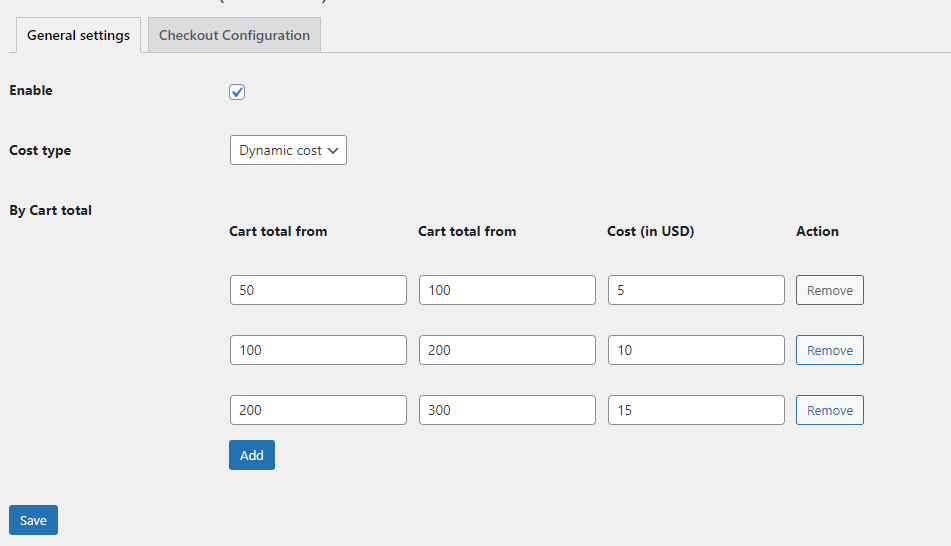
Within the settings, This is where you can configure different purchase protection cost by two methods.
Enable/Disable Purchase Protection:
On the “General setting” page, you’ll see option to enable or disable it.
Set Up Discount Details:
Within the configuration page for each discount method, you’ll find options to set the discount details:
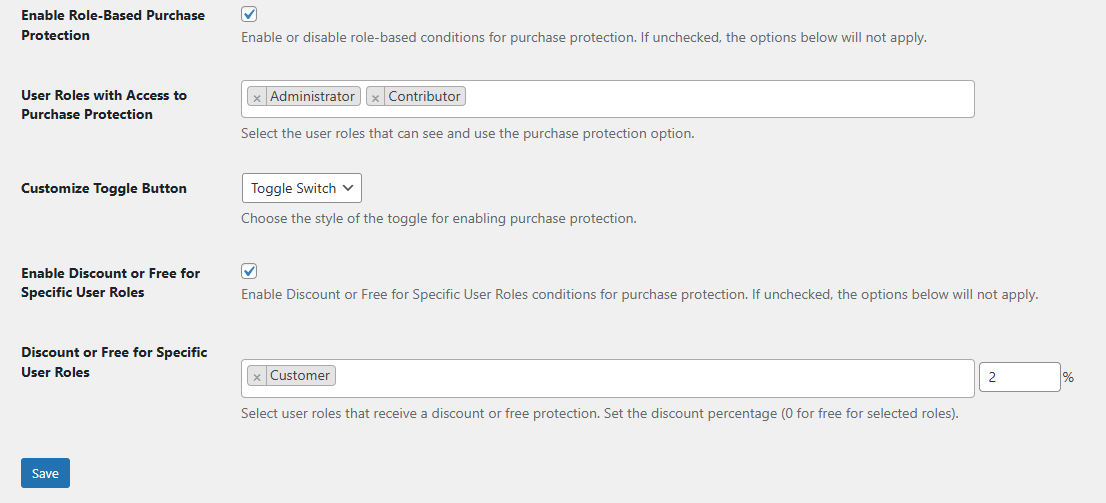
Enable Role-Based
Purchase Protection: Enable or disable role-based conditions for purchase protection. If unchecked, the options below will not apply.
User Roles with Access to Purchase Protection:
Select the user roles that can see and use the purchase protection option.
Customize Toggle Button : Choose the style of the toggle for enabling purchase protection.
Enable Discount or Free for Specific User Roles: Enable Discount or Free for Specific User Roles conditions for purchase protection. If unchecked, the options below will not apply.
Discount or Free for Specific User Roles: Select user roles that receive a discount or free protection. Set the discount percentage (0 for free for selected roles).
Save Changes:
After configuring, don’t forget to click the “Save” button to apply your settings.
By following these steps, you can successfully set up and configure purchase protection fees by fixed cost as well as cart total using the ” WooCommerce purchase protection” plugin in your WooCommerce store.
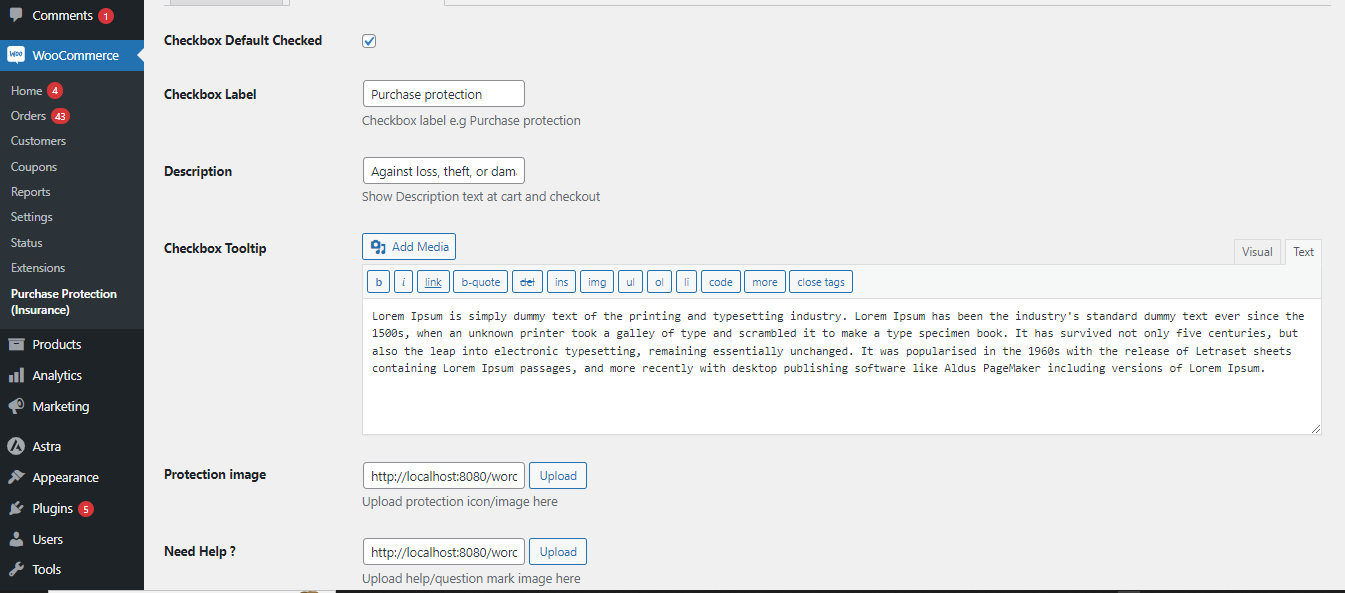
Please review all the screenshots for better configuration ideas.
